Author Archives: Lusine

Around The Emerald Isle

Is it me or does it seem like time the weeks are just flying by recently? I just realized that it’s been over a month since my last post, in which I promised you pictures of Ireland ‘soon’. Well, so sorry to keep you all waiting!

Better late than never, I suppose! Anyways! Ireland was nothing short of stunning, but I have to say..the people were by far my favorite part of the trip! Everyone you come across is not only friendly, but is sincerely interested to hear whether you are enjoying your trip and quick to shell out advice (and apologize for the weather).

Turns out, it looks exactly like all those pictures you see with rolling green fields and adorable stone fences.

Around The Emerald Isle - Tulips & A Terrier

With Celtic crosses everywhere.

Around The Emerald Isle - Tulips & A Terrier

Of course, there’s an abundance of castles.

Around The Emerald Isle - Tulips & A Terrier

Some of these castles have since been converted into hotels. Sadly, not ones that we could afford.

Around The Emerald Isle - Tulips & A Terrier

But the security guard was kind enough to let us wander the grounds normally reserved for guests. And we saw some cool things.

Around The Emerald Isle - Tulips & A Terrier

There are lots of tiny winding roads that are both terrifying and breathtaking. And yes, this is a two way road.

Around The Emerald Isle - Tulips & A Terrier

Certainly no shortage of sheep. I wanted to take this little guy home with us!

Around The Emerald Isle - Tulips & A Terrier

The Cliffs of Moher were literally the windiest place I’ve ever been.

Around The Emerald Isle - Tulips & A Terrier

Like I said, lots of rolling green fields.

Around The Emerald Isle - Tulips & A Terrier

And striking coastal scenery everywhere you look!

Around The Emerald Isle - Tulips & A Terrier

And I know this is totally a no-brainer, but if I could go back and change anything about the trip it would be to do less. I know, you’ve heard it a million times..but it’s for good reason! It totally sucks to fall in love with a place at first sight and have to leave the next day. Well, lesson learned.

I hope you enjoyed a little glimpse into our recent trip! Ever been to Ireland yourself? Or have some road trip advice to share? I’d love to hear from you!

– Lusine

DIY Canvas Art

Hi friends! I hope you are all enjoying the spring-like weather we’ve been having over the last few days! Having returned from Ireland last week (pictures coming soon!), I was pleasantly surprised to come back to a mostly snow-less city!

And the sight of budding trees has got me all kinds of excited for spring! I have a whole bunch of projects around the house coming up. Oh, and I’ve taken up gardening. As of last weekend. Depending on how that goes, you may see some updates on the blog!

Anyways! Ever attempted a somewhat ambitious DIY canvas project you came across on Pinterest and been less than thrilled with the result? And wished there was some way you could salvage the canvas? Well, I had a few laying that I had attempted to paint over, without much luck.

On an unrelated trip to the fabric store, I came across this adorable Parisian inspired fabric! And since I remain obsessed with Paris, or anything French for that matter, I bought two yards with no project in mind.

DIY Canvas Art - Tulips & A Terrier

And was dying to use it! Luckily, I thought of this before making more throw pillows. Not that there is anything wrong with more throw pillows.

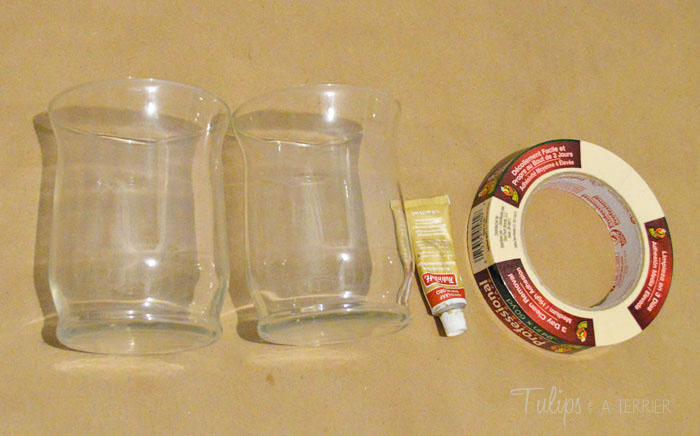
But this was wayyyy faster and didn’t require me breaking out the sewing machine! All you need is some fabric, a ruler and pencil (to trace the outline of your canvas onto the fabric), scissors, and a glue gun (staple gun would work too!)

Just to note – I did zero measuring when tracing/cutting the fabric. I would estimate you  want your fabric to be about an inch larger than the canvas on each side (depending on the thickness of your canvas), but I was too impatient to get into all that. Basically, you need enough fabric around it to reach the back of the canvas.

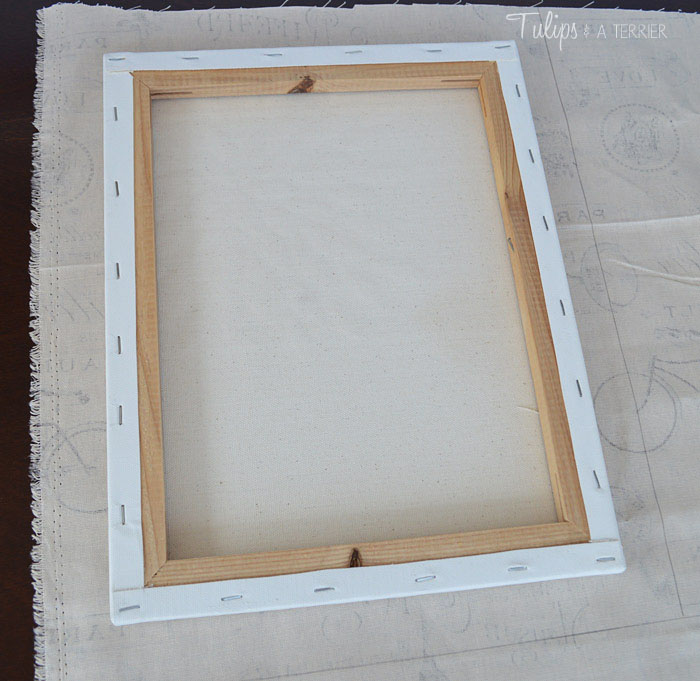
Start by placing your canvas on the fabric and use the pencil and ruler to trace an outline about 1 inch outside of canvas border. Now, you can iron your fabric prior to this step, or once it is cut. For me, it was easier to iron the little piece for fabric after it had been cut. However, ironing the fabric prior to cutting will probably give you a more accurate measurement, and reduce wasted fabric.

DIY Canvas Art - Tulips & A Terrier

Once fabric is cut & ironed, you can begin gluing it into place. If your fabric has a pattern which requires a specific alignment (i.e. stripes, chevron), use the ruler to ensure it is aligned properly. Once it is aligned properly, you may want to draw a line on the fabric along the edge of the canvas that you can use to ensure it stays aligned throughout the gluing process.  Use the glue gun to apply a small amount of glue to the center of the bottom edge of the canvas.

DIY Canvas Art - Tulips & A Terrier

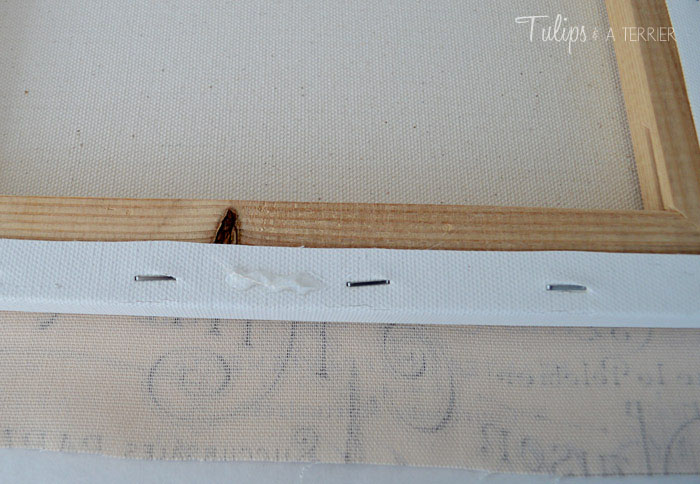
Pull fabric fabric over the edge of the canvas and glue into place. Continue applying glue along the edge of the canvas every 2 inches or so and gluing fabric into place, and stop when you are about an inch or from the corners.

DIY Canvas Art - Tulips & A Terrier
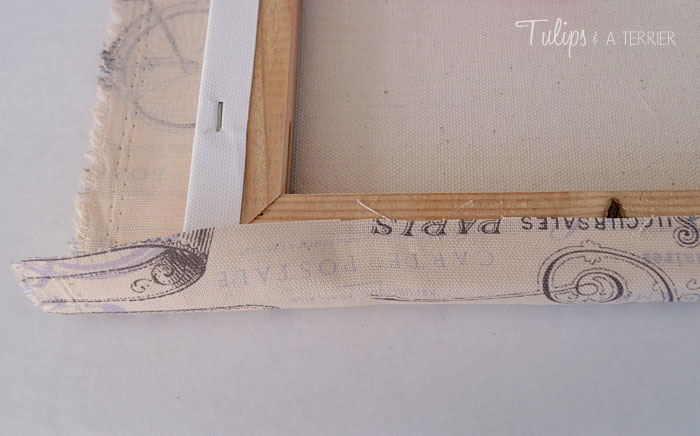
Now, begin gluing the edge opposite to the one you just completed. Be sure to pull the fabric super tight over the canvas when gluing the second side! And leave a little room around the corners again.

You can then glue the remaining sides of the canvas, pulling the fabric tight as you go.

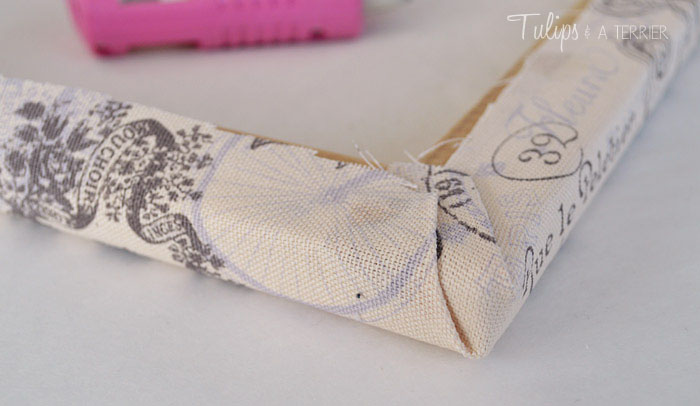
Now..for the corners. Unfortunately, I don’t have a very scientific way of describing what I did here. So I thought a picture might do the trick. Basically, I took the loose fabric at the corner and made a fold that would allow one edge of the fabric to remain flat against the canvas, glued it in place. And then I did the same for the other edge with the remaining loose fabric. Does that make sense? No?  Here is the picture..

DIY Canvas Art - Tulips & A Terrier

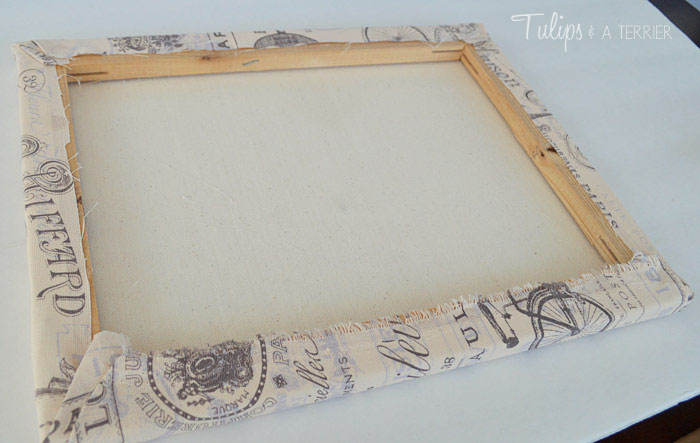
This is what the back of my canvas looked like at the end. Not exactly a work of art, but I don’t think anyone is going to remove the canvas from the wall to examine the back of it..  You can always trim the edges with some scissors to clean it up if it bothers you!

DIY Canvas Art - Tulips & A Terrier

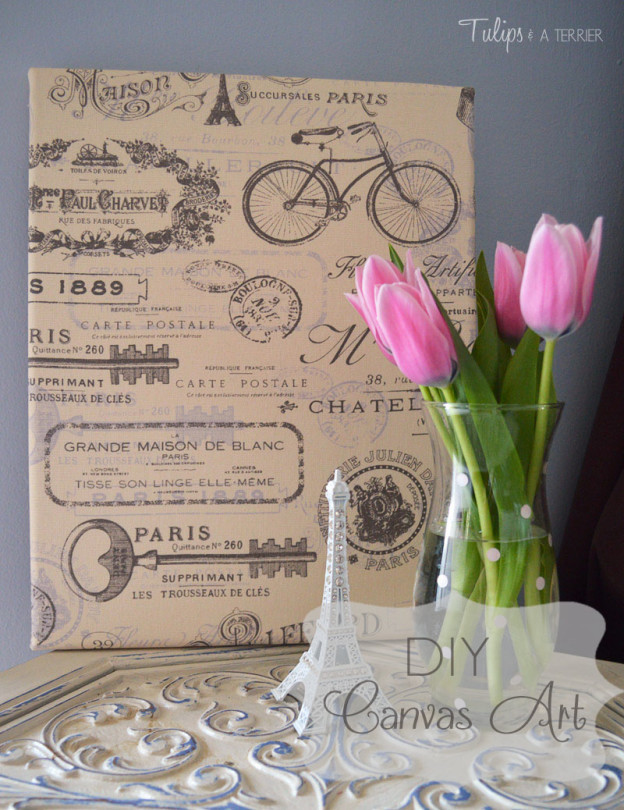
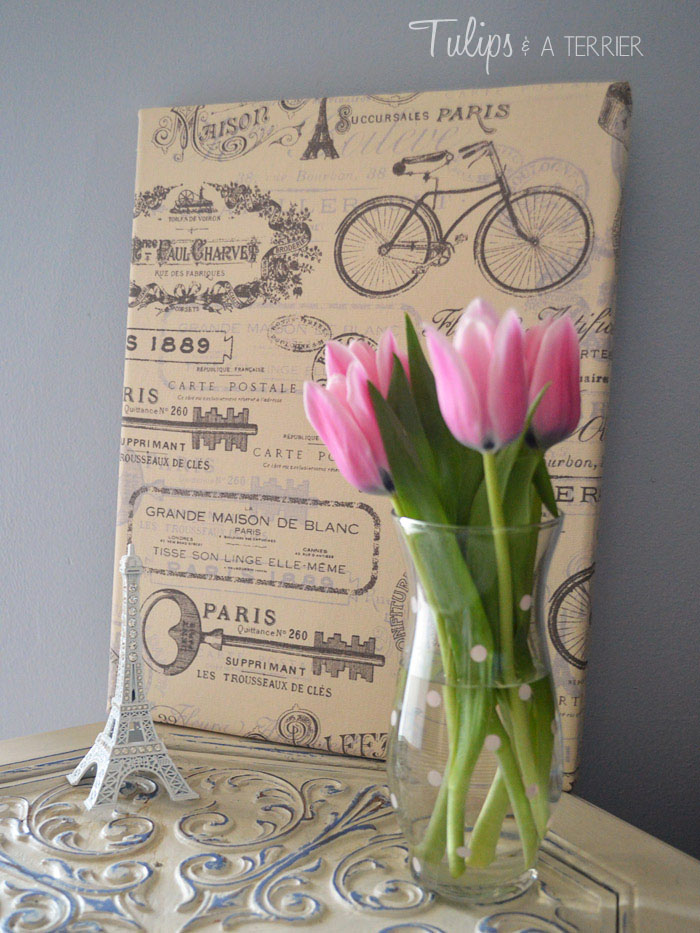
I have to say, I do love the finished product! Well, I love the fabric..and any excuse to display it is a plus in my book!

DIY Canvas Art - Tulips & A Terrier

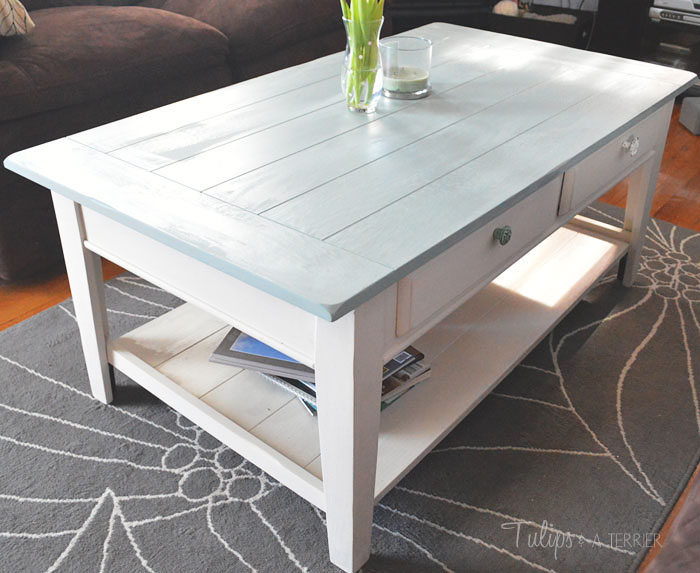
And obviously it made sense to display it with my Eiffel tower souvenir on this (I like to think) French inspired end table. I made 3 in total and was planning on hanging them in the bedroom, but I guess this is a pretty good spot until I get around to that!

DIY Canvas Art - Tulips & A Terrier

I’d love to hear from you! Have you found any ways to repurpose an old canvas? Harbor an obsession with Paris and want to talk about how magical of a city it is? I’m always down for that convo :).

– Lusine


Ombre Wine Bottle Vases

Anyone else out there really craving a pop of brightness? I’m soooo done with wearing dark dreary colors, with matching dark dreary manicures. I’m ready for pastel and floral everything. Like immediately. I just keep telling myself that if I visualize spring, it will come. If you could be so kind as to visualize with me, maybe it will come sooner.

Even if that’s not as easily said as done in the outside world, that doesn’t stop me from making it feel as much like spring in my own home as possible. In addition to stocking up on spring scented hand soap and candles, it doesn’t hurt to have some fresh flowers around. And something pretty and pastel to display them in.

And here you probably thought I had exhausted the possibilities of decorating wine bottles in my previous posts. But don’t worry, we’ve only just scratched the surface. I’ll also note that the wine bottle posts continue to be some of the most popular on the blog…so clearly there is a demand there. Because who doesn’t love to recycle?

Anyways, this was actually way easier and less time consuming than I originally thought, and there is a good chance you already have all of the supplies on hand.

Ombre Wine Bottle Vases - Tulips & A Terrier

Supplies:

  • Wine bottles (could be any type of glass bottle or container, really. Go nuts!)
  • White spraypaint
  • Craft paint in white and another color (or multiple colors, in my case!)
  • Paper plate or something that can be used to mix colors, and something to mix with (I used  popsicle sticks)
  • Small-ish paintbrush (I used the smallest one I saw at Home Depot,  .97 each).

Start by removing the labels and foil from your wine bottles (or glass container of choice) along with any glue (this is my go-to for removing those pesky labels). Once the bottles are clean and dry, give them a couple of coats of white spraypaint and let dry.

Next, squeeze a dollop of the paint color (not the white) that you plan to use for your ombre onto your paper plate. You don’t want to use a ton, since more paint means more white to dilute it, and this project doesn’t require a ton of paint so you’ll be wasting a bunch.

Using just the color, paint a ring of color along the base of your bottle. Try to make it as straight as possible, but it’s doesn’t have to be perfect.

Ombre Wine Bottle Vases - Tulips & A TerrierSquirt a bit of white paint into your color and mix. I found it best to add small amounts of white and mix until you arrive at a color that is a tiny bit lighter than the last.  At this point, I’d also like to apologize for the quality of the next few pictures. My hands were covered in paint, and the sun was going down so I didn’t have the luxury of fiddling around with camera settings. I’m sure you’ll get the idea.

Once you have a color that looks a couple shades lighter than your last, paint another ring slightly overlapping the one you just made.

Ombre Wine Bottle Vases - Tulips & A Terrier

Continue adding white to your color and adding rings of paint onto the bottle until the shade of color is barely tinted.

Ombre Wine Bottle Vases - Tulips & A Terrier

After I finished with all 3, I went back and blended the edge of the ombre using white paint on a foam pouncer.

And that’s all folks! Allow to dry fully, and then place around your home to inject an ounce of spring where you can.

Ombre Wine Bottle Vases - Tulips & A Terrier

Better yet, fill them with fresh flowers and pretend that there isn’t 10 feet of snow on the ground.

Ombre Wine Bottle Vases - Tulips & A Terrier

I’d love to hear from you! What are you doing to get through the last few days of winter? PS – this is the last week of February!! Realizing that totally made my day.


Sharing at Work It Wednesday & That DIY Party

Coffee & End Table Makeover

Good news friends, I’m still alive! Just buried under about 18 feet of snow. I really wish that was an exaggeration, but it’s really not. And here we thought we had it so good when it was 50 degrees on Christmas day and mid January showed no sign of snow. Well, looks like mother nature decided to cram 4 months of winter and snowfall into like 3 weeks. Needless to say, it’s a little tough to stay inspired when it takes you 10 minutes to get out of your driveway, and days of grilling out in the yard feel a million miles away.  On a positive note, March is less than two weeks away!

But rest assured, I have tried to spend these days of being barricaded in my house productively! On the day before blizzard # 1,  I bought myself a power sander and decided to put it to good use. And what better way than a quick table makeover!

My coffee table and end table have been on my to do list for a while. Just plain brown tables. Ordinarily, one may not see anything wrong with plain brown tables, but in a room that also has big brown couches, brown curtains…well, you might as well be sitting inside of a tree.

Tulips & A TerrierThis is a before of the end table. Of course, I forgot to get a before of the coffee table.. but they were pretty identical so you are not missing much.

A couple coats of ‘Parisian Taupe’ by Behr, and a new knob later, and voila! Clearly, I am someone who picks paint colors strictly based on the name. Also, ‘Paris White’ is actually pink. In case you have the same problem and any mention of Paris in the name is often your deciding factor.

End Table - Tulips & A Terrier

While I was at it, I thought I’d do the coffee table over as well. Since the table gets a good amount of use,  I wasn’t so sure about painting the entire thing white (in fear of it looking filthy within a couple of weeks). Plus I really hate matchy furniture.

So, I picked up a sample of ‘Grey Morning’ (also by Behr) for the top. It’s more of a duck egg blue than a gray, but I am totally obsessed with the color.

Coffee Table - Tulips & A Terrier

The combination of the two really brighten up the room! The mismatched knobs are unintentional…I happened to have some knobs from Hobby Lobby that I purchased for another project, but I think it looks kind of cool.

Coffee Table - Tulips & A Terrier

What else have I been up to while snowed in every weekend? Cuddling with one handsome Jack as I challenge my abilities at crochet (I made a hat!), while simultaneously rekindling my love of various shows now available to stream (Saved by the Bell is on Netflix!!). Oh, and planning a trip to Ireland next month. More on that over the next couple of weeks!!

Tulips & A Terrier

How is Jack doing, you ask? Oh he’s still his usual pouty self. Longing for the days of sunbathing outside and unobstructed access to his poop spot.

Tulips & A Terrier

How are you spending all this time being snowed in? If you happen to reside somewhere warmer,  I hate you. Just kidding! What are some of the things you’re looking forward to this spring?

Gold Dipped Votives

Hello friends! I hope you all had a lovely holiday season! As much as I love the excitement of the holidays..the presents, the parties, the glitter..I’m a little relieved to see them end. Truthfully, I really missed having a weekend of doing absolutely nothing here and there. Seeing as how it’s January, there’s probably quite a few of those on the way. I like to think I’ll use them constructively and finally organize my closet or something. But realistically speaking, all 10 seasons of Friends are now available on Netflix…so I’m not making any promises.

I finished this project probably about a month ago, but haven’t found the time to put together a post. I have to say, in my opinion, Rub n’ Buff has got to be the most underrated crafting supply there is! This stuff is so great! We used it to update the hardware when we were making over the bathroom last year, and it’s held up relatively well! It’s a great alternative for projects in which using spraypaint would require you to tape off the whole room.

While this isn’t one of those projects, I really like gilded texture it gives. I just think that votive candle holders from the dollar store are a perfect base for any craft experiments. If it doesn’t go as planned, you’re only out a buck! Along with you votive (or vase, bottle, whatever you choose to use), you will need some painter’s tape and some Rub n’ Buff in your choice of color. I used gold leaf, but there are a whole bunch of options available!

Gold Dipped Votives - Tulips and A Terrier

First, you just tape off the area which you plan to stain. I chose to do a stripe at rim, but you can totally get more creative here! I’m not great with taping in straight lines so I thought it be best to refrain from any sort of complicated pattern.

Gold Dipped Votives - Tulips and A TerrierI ended up adding a piece of tape to the inside too, just to prevent me from rubbing the wax into the votive, as you can see in the next photo. Using the Rub n’ Buff is truly as easy as the name suggests. You rub it on. I’ve heard of people doing this with a cloth or a sponge, but I find that I got the best results using my finger. You just apply and rub the product back and forth until it’s blended into the surface.

Gold Dipped Votives - Tulips and A Terrier

Allow it to dry for a few hours, and then you buff with a cloth to give it a shiny gilded finish! Depending on your surface and the look you’re trying to achieve, you might want to do a second coat. Since I knew that lighting a candle in the votive would allow light to shine through any gaps, I tried to go for a very opaque finish and added a second coat.

Gold Dipped Votives - Tulips and A Terrier

And that’s pretty much it! Just allow the Rub ‘n Buff to dry for a couple of hours.

Gold Dipped Votives - Tulips and A Terrier

Oh, and I added some ribbon. Because why not.  What do you guys think? I really like the way they came out! I think these would be so pretty in a black and white tablescape, or mantle!

Gold Dipped Votives - Tulips and A Terrier

I’d love to hear from you! Have you ever used Rub n’ Buff? Have any ideas to share?

– Lusine