Category Archives: Projects

End Table Makeover

I’ve been itching to paint a piece of furniture for a while now. There’s something about the process I find somewhat therapeutic. Just spending a lovely afternoon with my paintbrush feels like unplugging from the stresses of everyday life. Plus watching it all come together feels so rewarding!

And since I still had an extra week of vacation following our return from Paris, it seemed like the perfect time to see what I could do with this end table.  It’s been sitting in our garage for close to a year! My boyfriend happened to see someone throwing it away and thought I could spruce it up. Nothing better than a free piece of furniture, if you ask me. Especially one with such pretty details!

End Table Makeover - Tulips and a Terrier

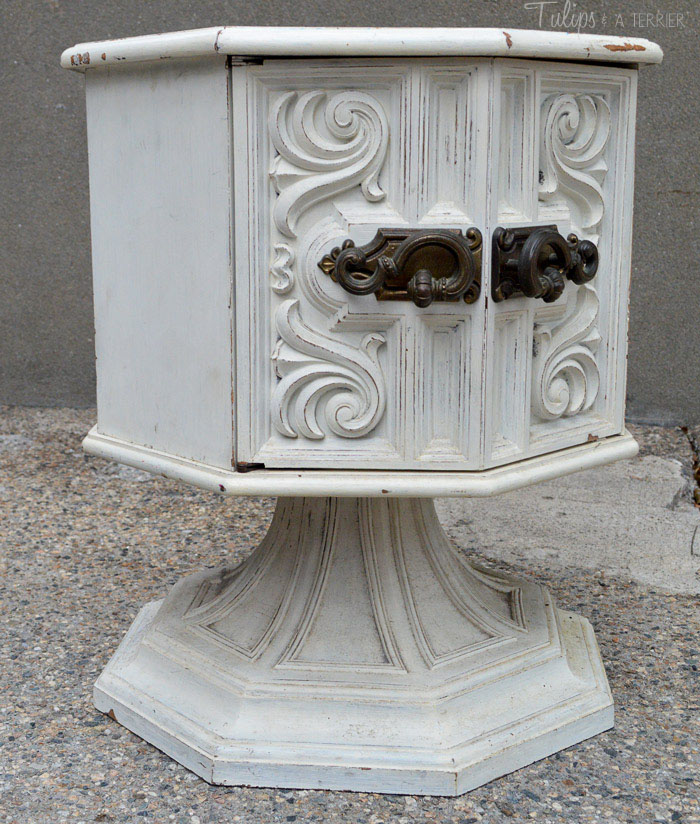
I knew I wanted to do something to bring out the details of the wood by painting it a bright base coat, and painting over it with a neutral and sanding over the edges to allow the base coat to come through.

After a thorough cleaning and sanding, I painted it a creamy blue (which I mixed into a DIY chalk paint).  How pretty is this color! For a second I debated leaving it, but it’s very similar to the color we used on our living room walls, so I didn’t want it to blend in too much.

End Table Makeover - Tulips and a Terrier

I did a quick search to see how best to distress the top coat to allow the base coat to come through, and came across a method using Vaseline! I guess the Vaseline prevents the top coat from sticking too much to the base coat, which makes it come off easier in the sanding process.

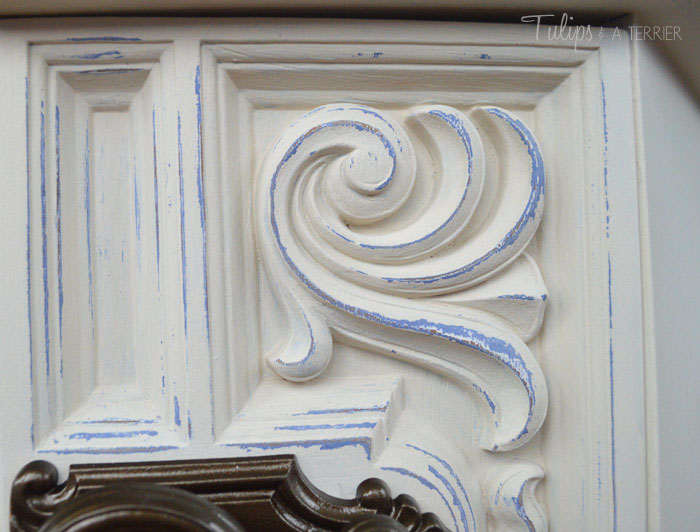
I applied a thin layer of Vaseline to the areas I planned to sand off. In this case, it was the edges of the table and the pattern on the door and the top of the table to accentuate the shapes.

End Table Makeover - Tulips and a Terrier

Following the Vaseline application, the table got two coats of Parisian Taupe (because I select paint colors based on name) also mixed into DIY chalk paint.

End Table Makeover - Tulips and a Terrier

Once dry, I lightly sanded over the pattern and edges of the table using a fine grit sandpaper. The Vaseline totally worked! The top coat of paint came off easily and had the exact look I was hoping to achieve!

End Table Makeover - Tulips and a Terrier

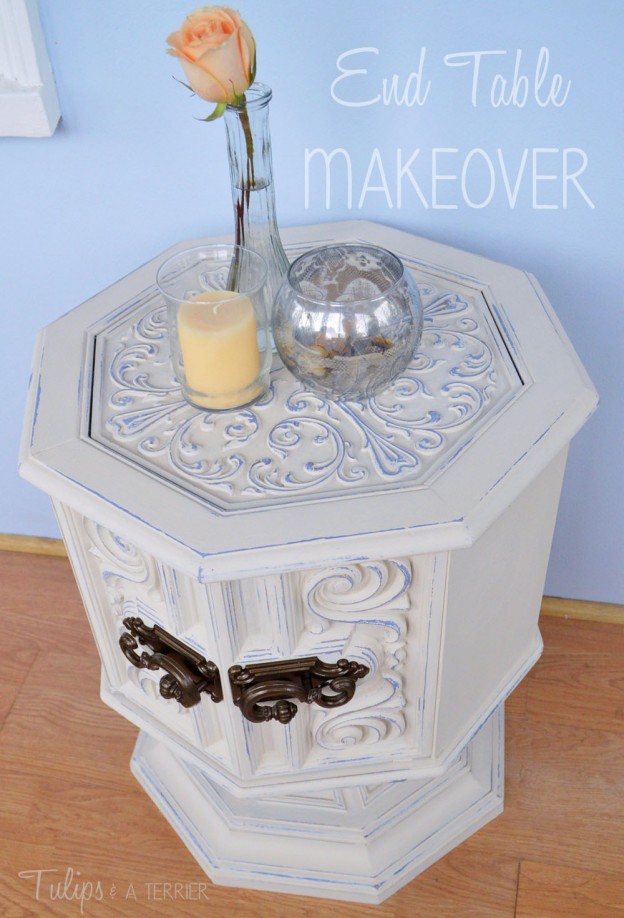
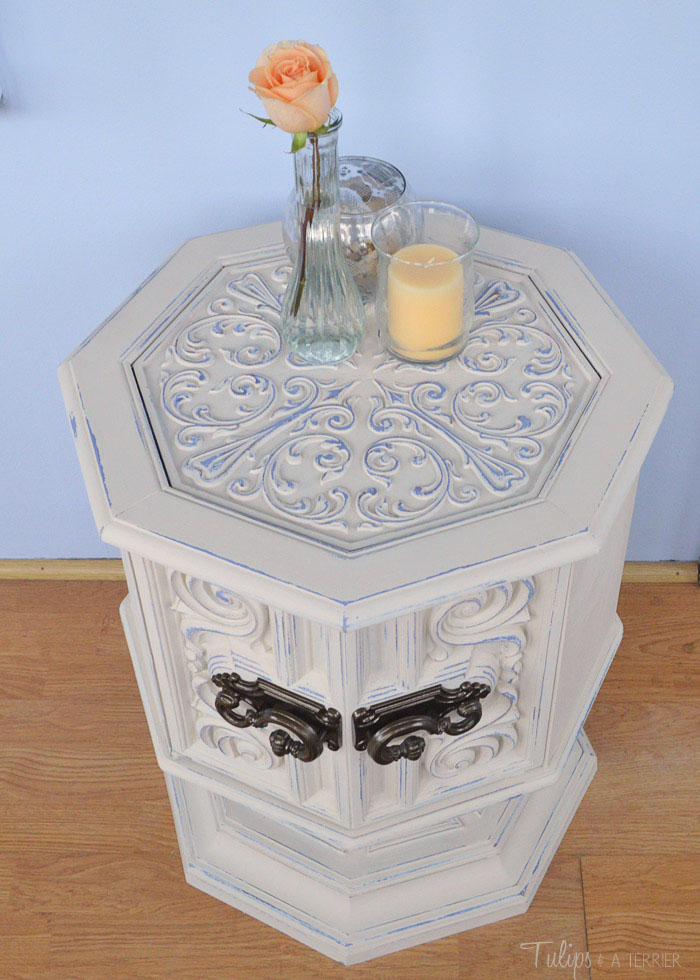
I just love the way the pattern looks with the blue popping out of the white! It definitely brings out the beautiful lines of the table! I finished it with two coats of Polyacrylic to seal the paint, and voila!

End Table Makeover - Tulips and a Terrier

Not bad for a freebie, eh? I’m so excited to add it to our living room! I don’t think you can go wrong with chippy white paint. The window directly facing ours in Paris had these lovely old shutters with chippy white paint which I was obsessed with all week, so I guess you could say this project is Paris inspired.

End Table Makeover - Tulips and a Terrier

I’d love to hear what you think!

– Lusine

DIY Plant Pots

So, I understand that a post about plant pots is somewhat out of character for a self proclaimed black-thumb, but I’ve turned over a new leaf. Having killed more plants over the course of my life than I would care to admit, I am excited to announce that I have started an herb garden! And kept it alive for over a month! Nothing too impressive here..just three plants, really..but I am quite pleased with myself for keeping them alive for over a month!

One thing that I’ve heard from some gardening experts (thanks mom!), is that plants like love. And while I can’t bring myself to stand there and talk to them, I’ve decided to show them love by giving them somewhere pretty to live. I’ve also given them names, but I won’t get into that. No more ugly plastic containters for these guys!

I started with a couple of these terra cotta pots from Home Depot. While I think these are quite adorable as they are, I thought I’d jazz them up a bit.

DIY Plant Pots - Tulips and a Terrier

I gave them a couple of coats of white spraypaint and tried to decide where to go from there. In my opinion, the toughest part of a DIY like this one is actually making up your mind. There are sooo many options and decisiveness is not exactly my strong suit.

DIY Plant Pots - Tulips and a Terrier

After consulting my craft supply, I decided to try to save some money and use whatever I had on hand. I had these stencils left over from when we made Christmas ornaments last year, and I figured you can’t go wrong with stencils and gold paint (plus my trusty pouncers for applying said gold paint).

I must warn you, this isn’t particularly creative..but I basically just used the stencils to label the plants. I’m  sure you can figure out the rest from here..

Apply stencils..

DIY Plant Pots - Tulips and a Terrier

Paint..

DIY Plant Pots - Tulips and a Terrier

Remove stencils..voila!

DIY Plant Pots - Tulips and a Terrier

I did however think that the letters were spaced a bit far apart for my liking, so I tried to overlap the stencils the second time around. I also had to do ‘lavender’ in parts because the package of stencils only gives you one per letter.

DIY Plant Pots - Tulips and a Terrier

I will say, overlapping the stencils seems like the way to go. Since they all stick to one another, you can peel them all off at once!

And then I decided to add polka dots. Because, why not? I used the same method seen here, but with the craft paint instead of nailpolish. While I’m sure you can use nailpolish, I was trying to keep the color consistent.

DIY Plant Pots - Tulips and a Terrier

I left the stickers on for a bit longer than I should have, which caused parts of my polka dots to peel off with them, but I can just pretend I was going for a weathered look anyways.

DIY Plant Pots - Tulips and a Terrier

I’d love to hear what you guys think! Better with polka dots or without? Also feel free to share any gardening tips which would help me continue to keep the plants alive.

– Lusine

DIY Chevron Tray

I’m pretty stoked to be posting my first ever successful chevron project today! As much as I love this pattern, I have found it absolutely impossible to recreate using any of the so called ‘easy’ methods found online. What seems to be a basic pattern at first sight is actually really tough to get right!

Since I’m terrible at lining things up evenly and all, I usually stick to a more whimsical polka dot pattern or something of the sort and had basically given up any hope that I would ever have a successful chevron DIY at all.

So when I saw this post a while back featuring this chevron tape, I ordered some immediately. And for a while, I couldn’t decide what I wanted to use it on.

And then came inspiration in the form of a round cookie sheet from the dollar store. So, I figured I’d give the chevron tray thing another try.

DIY Chevron Tray - Tulips and a Terrier

I’m sure you can figure out what happened from there, and this doesn’t really warrant a full tutorial. I gave the cookie sheet a couple of coats of white spraypaint (or primer, as evident in the above photo). And then proceeded to tape it off.

Clearly, I wasn’t lying about my inability to line things up evenly. Luckily, it’s not really that obvious in the finished product!

DIY Chevron Tray - Tulips and a Terrier

Followed by a couple of coats of my go-to gold spraypaint.

DIY Chevron Tray - Tulips and a Terrier

Carefully peel off the tape. And voila! I wasn’t kidding about it not warranting a full tutorial.

DIY Chevron Tray - Tulips and a Terrier

I’m pretty happy with the results! Sure, the pattern could have been made better if I took the time to measure my taping but I’m perfectly fine with my lobsided chevron!

DIY Chevron Tray - Tulips and a Terrier

I really don’t think you can ever go wrong with white and gold. And think the glitter vase complements it nicely. Obviously, I was just looking for gold things to put on the tray, hence the perfume bottle. Not bad for a dollar store cookie sheet, eh?

I’d love to hear what you think! Ever attempted a DIY chevron pattern?

DIY Floral Picture Frame

Hello friends! I hope you’re all enjoying the first few days of summer! First, I’d like to apologize for disappearing yet again. It has been a hectic couple of months for me and it feels like weeks fly by in the blink of an eye..and then I notice that it’s been over a month since my last post. I’ve actually had this project done and photographed for a while, I just haven’t found the time to sit down and write a post.

Well, I won’t hold out on you any longer! Because if you have $2 (plus tax), and some basic supplies on hand, you too can add a lovely, custom made floral picture frame to your home!

As you may have noticed from previous posts (such as this one, and this one), I regularly scour the dollar store for DIY project ideas. I just think it’s the perfect way to experiment with ideas that might or might not work because it’s practically free. If something doesn’t work out, you aren’t going to lose sleep over the $2 you’ve wasted trying (and if it does work…win!)

And in case you didn’t already know, the dollar store sells faux flowers. The large majority of them (below included) are the fakest looking of flowers that you would normally never consider displaying in your home.

But if you’re going to glue them to a picture frame and spray paint them, they don’t look too bad. And I don’t think anyone would expect them to be real.

DIY Floral Picture Frame - Tulips & A Terrier

Supplies:

  • Faux flowers
  • Picture frame with a flat surface (I would aim to have it be on the wider side to allow more room for flowers).
  • Spraypaint
  • Hot glue gun
  • Scissors

So, I totally did not realize that the white spray paint I had been using was actually primer until I went to take the above picture. I suppose if I haven’t noticed a difference yet, there’s probably no sense in trekking to Home Depot and buying another bottle. So, if you’re in the same predicament..primer works just fine!

Use the scissors to cut the faux flower blossoms off of the stem. If you are using better quality flowers, you may need wire cutters for this step. A regular pair of scissors worked just fine on the flowers from the dollar store.

DIY Floral Picture Frame - Tulips & A Terrier

Glue your flowers to the frame using a hot glue gun. You want the back of the flower to stick right onto the frame, so if the back of your flower isn’t completely flat, you can nudge it into a corner as I did! DIY Floral Picture Frame - Tulips & A Terrier

Once the flowers have been secured to the frame, allow the glue to dry for a few minutes and proceed to paint!

DIY Floral Picture Frame - Tulips & A Terrier

I applied two thin coats of paint and  it looked opaque enough for my liking. But, as I previously mentioned, I had inadvertently used primer to paint my frames. Just be sure to apply thin even coats and continue to add coats until you’re happy with the color. I would recommend wearing disposable gloves so that you can move the floral petals around as painting to allow you to coat the inside.

DIY Floral Picture Frame - Tulips & A Terrier

And that’s pretty much it. You just allow the frame to dry (spraypaint dries super fast in this weather!) and fill with a photo of your choice!

DIY Floral Picture Frame - Tulips & A Terrier

I love using kraft paper as the backdrop for black and white photos. It just looks so classic, no?

I’d love to hear what you guys think! Have you found any creative uses for those tacky dollar store flowers? I could use some ideas for the other half of the bushel :).

DIY Polka Dot Vases

I don’t know what it is lately, but I’ve been REALLY digging pastels. Actually, I know exactly what it is. It’s the fact that this 6 month long winter finally appears to be over. Now, I don’t want to jinx us here but I think it’s safe to store away those snow shovels and pea coats. Something about those blooming trees and waking up to the sound of birds chirping always makes me want to inject a little bit of mint green or pale pink anywhere I can get away with it.

And nowhere is the selection of pastels as abundant, varied, and readily available than in the nailpolish section of your local supermarket or pharmacy. Come to think of it, everything needed to complete this project can be found at either of the above. I’m all about saving a trip to the craft store if possible.

In my case, all of the above was lying around the house. How convenient is that! A Starbucks frappuccino bottle, some pastel nailpolish, and some binder reinforcement rings (originally purchased for these mugs). Sadly, the sharpie used in said mugs didn’t hold up as well as I’d hoped. I have higher hopes for nailpolish.

DIY Polka Dot Vases - Tulips & A Terrier

First, a little confession..I can’t paint nails to save my life. I ALWAYS manage to screw it up. I miss half my nail, instead opting to paint my entire cuticle AND can never sit still long enough for it to dry. And spill it all over myself from time to time. Even when I manage to avoid the above, it still never fails  to look terrible. So, I thought it best to leave it to the professionals

But every now and then, I see a pretty color while browsing at CVS and think ‘how hard could it be?!’. And inevitably I screw it up and the nailpolish sits there unused. So, I’m glad to have found an alternative way to use it.

This actually came together a lot quicker than I anticipated and you can totally apply this to any glass or plastic surface (I may just need to redo my mugs!). First, apply binder reinforcement rings to your surface to create the polka dot pattern. As you’re applying them, don’t stick them down all the way but fold up the edge that you won’t be painting. Trust me on this one, it makes peeling them off MUCH easier.

DIY Polka Dot Vases - Tulips & A Terrier

Then, you just color them in with your choice of nailpolish! You want to apply thin, even coats (exactly the way you would if you were painting your nails). I went around the bottle once, let dry for a minute, and then gave them a second coat. The number of coats will depend on the opacity of your nailpolish and the look you are trying to achieve.

DIY Polka Dot Vases - Tulips & A Terrier

Once your polka dots have been painted to your liking, let it dry a little bit, and proceed to carefully peel the stickers off. You want to peel them off slowly (as in, opposite of what you would normally do with a band-aid). Otherwise, you risk losing part of your polka dot. Let the nailpolish dry fully, and enjoy!

DIY Polka Dot Vases - Tulips & A Terrier

I had this vase from the dollar store that could use a little polka dotting as well. If anything, this seems like a pretty genius way to enjoy that color you absolutely loved in the bottle that doesn’t look as amazing paired with your skin. Or if you continuously buy nailpolish despite never painting your own nails. In case you’re wondering, the colors I used are Mint Candy Apple and Fiji, both by Essie.

What do you guys think? I was pretty impressed with how perfect the polka dots came out! Who knew nailpolish could also serve as glass paint?!

DIY Polka Dot Vases - Tulips & A Terrier

DIY Polka Dot Vases - Tulips & A Terrier